
Scrap-chi is what we like to call this handy ‘recipe’ to use up some of the veggies that’ve started to go a bit wibbly in the fridge. It’s basically the method and flavour profile we use to make traditional Korean kimchi (recipe below), but it just uses up what we have laying around. It takes all of 13 minutes to make (if you take your time and make a mindful process of it), is delicious, and it saves so much food from being wasted. If you’re absolutely new to fermenting and feel a bit unsure about it all, have a read of our Sauerkraut recipe: it goes over allll the details and questions you want covered as a beginner.

INGREDIENTS FOR MAKING SCRAP-CHI:
- Some veggies. Root veg (things like carrots, turnips, daikon, radish) and brassicas (wombok, cabbage, broccoli) are great for this. Celery also works well. Ideally you want some sort of brassica in there as it adds a distinctive flavour. It’s a brilliant way to use up broccoli stems!
- Some alliums. Onion, shallot, spring onion, wild onion grass etc.
- Some ginger. Fresh is best, but frozen is good too. Avoid jarred stuff – it has additives that can mess with fermentation.
- Some garlic. Same applies as for ginger.
- Salt. Small granules, no additives.
- Gochugaru (Korean chilli flakes) Or gochujang (Korean chilli paste). Korean chilli is milder and more flavoursome than bog-standard ‘chilli powder’, so it is best to get either of these if you can.
- (Optional) Fish sauce or vegan fish sauce.

BASIC METHOD:
Making kimchi looks a little different in each household, and making Scrap-chi is even more individual, as it’s likely to be different each time you make it based on what you have on hand. So before going over the nuances and potentially getting tangled up in confusion, we reckon it’s helpful to know that the absolute basic essence of making kimchi goes like this:
- Peel, trim and chop veggies & alliums.
- Mince/crush garlic and ginger.
- Add gochugaru/gochujang and fish sauce.
- Weigh everything together in a bowl, then add 2% of that weight in salt.
- Mix & massage until a bit juicy.
- Shove in a jar and weigh down veg. Overnight, more brine will form, covering veg.
- Leave it alone in a cool dark spot for 3-5 days. When you like the taste, seal it in a jar and keep in the fridge.
It feels too simple, but truly, it *is* simple once you’re confident with the basic method. To help you become comfortable with it, here are some of the nuances you can play around with…


DETAILED METHOD:
1. Peel, trim and chop veggies & alliums.
Well-scrub or peel the skin of root veggies and remove tops & tails. Chuck these in a tub in the freezer to make stock in the future. Remove papery peels from alliums & compost them (they don’t have any flavour value for stock). Cut out any obviously manky bits and compost them too.
Remove any really tough bits of veg, like the outer skin of broccoli stems (you can see the difference between the skin and the sweet crunchy centre in the photo above) and the tops of root veg. You can regrow carrot leaves for using in salads and pesto by placing the sliced top on a plate with a wet teatowel on it and keeping it on the windowsill if you like. The one above had already started sprouting in the crisper drawer!
It’s up to you how big or small you want your ingredients to be – some traditional Korean recipes ferment entire cabbages whole, so there really isn’t any ‘perfect’ size. Remember that the larger and firmer ingredients are, the longer they’ll take to ferment.
2. Mince/crush garlic and ginger.
You can do this by hand with a big knife, or with a fine grater, or in a crusher, or in a food processor. It all depends how much you’re making and what you feel like doing. Side note – we also added some coriander to this batch, because we had it. Experiment with different herbs if you want to!
3. Add gochugaru/gochujang.
This is very much up to your personal preference: we don’t add heaps as we’re not overly fond of super-hot food. One suggestion is to be conservative (2tbsp per 1kg of veggies), mix it all up, give it a taste and then add more if you want to give it more oomph. Add a dash of fish sauce – at an estimate, we use maybe 1tbsp per kilo of veg.
A note on gochugaru (dried chilli flakes) – the containers you buy them in often have a shaker style lid, which means they’re not completely airtight. If you’re only planning to make kimchi infrequently, transfer your gochugaru to a different, thoroughly airtight container or else it’s likely to grow mouldy (we’ve had that happen twice).
4. Weigh everything, then add 2% of that weight in salt.
Weigh how many grams your combined ingredients equal. Multiply that by either 2% or 0.02 on a calculator, and that’s how many grams of salt you need to add. Use pure salt that has no preservatives or anti-caking agents in it, as these affect fermentation. It’s easier to work with granulated salt, as it dissolves quicker than rock salt.
5. Mix & massage until a bit juicy.
You want to make sure every cut surface of vegetable comes into contact with salt, so get right on in there and rub everything together. After a little while, you’ll notice veggies getting a bit less firm, and liquid pooling at the bottom of the bowl. That’s because the salt has begun to draw water out from the cut surfaces, thereby creating a salty brine solution in which the veggies are going to ferment. Don’t go overboard – you don’t need masses of liquid at this stage, just enough so that everything is slightly wet.
6. Shove in a jar and weigh down veg.
Pack the veg into a clean jar as tightly as you can. You can use any sort of non-corrosive food-safe vessel to do this in: a clip top jar, a standard glass jar, a plastic jar, a ceramic (non-porous) crock, or you could even do it in an enamelled jug or bowl (providing there are no chips in the enamel).
Use a potato masher to pack the mixture into your vessel if you want, or a carrot, or the end of a rolling pin. You’ll notice briny liquid rising higher in the jar when you do this. You want to weigh everything down next so more liquid will be pushed out of the veg under pressure. In the second and third photo below, you can see how much more brine there was after a night of being weighed down.
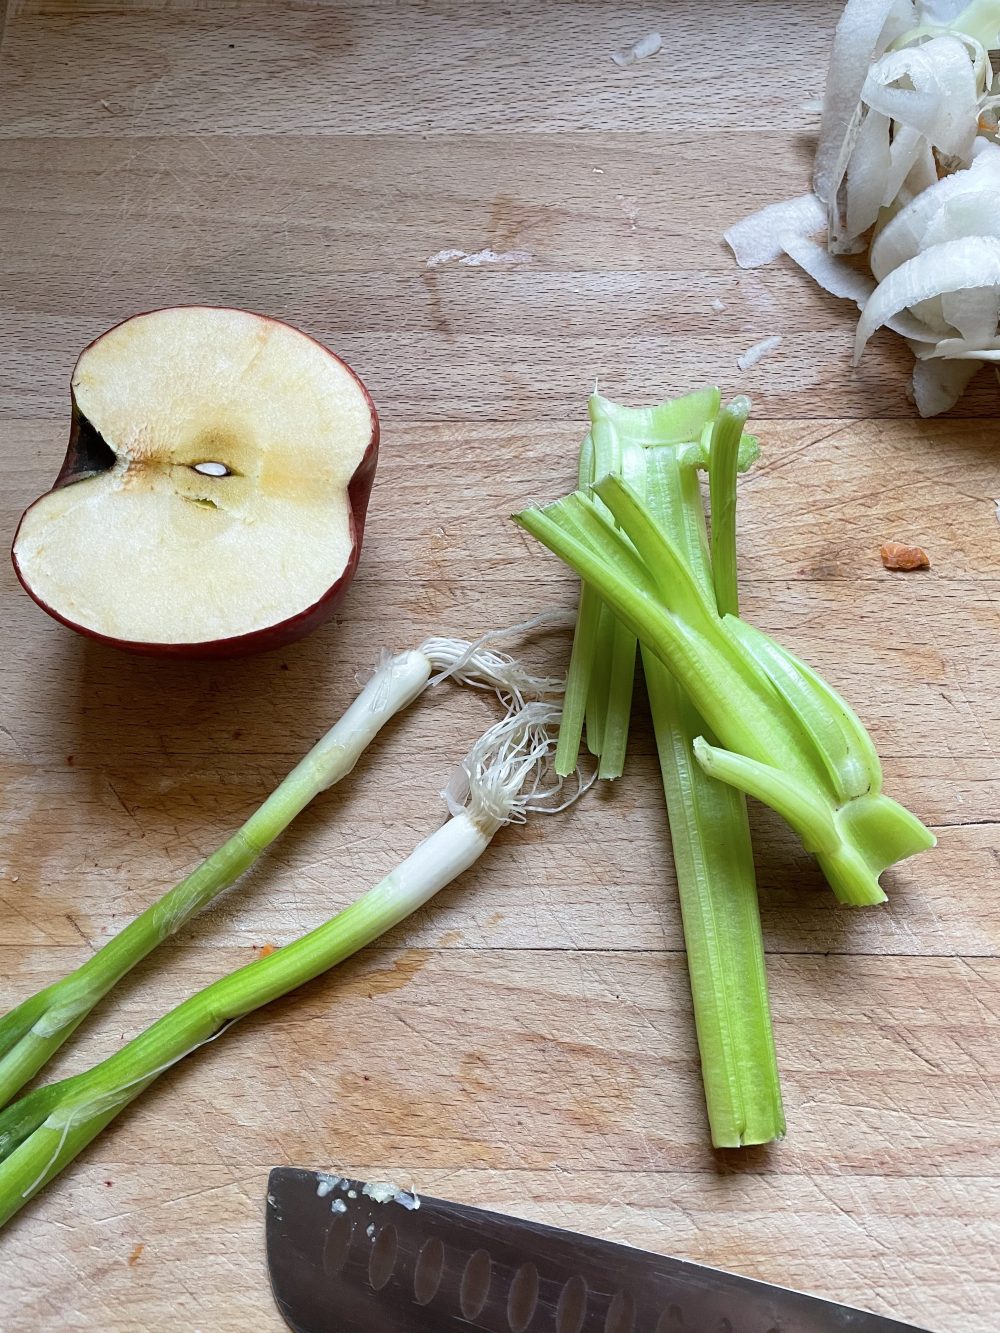
To weigh down the veg, you can use fermenting weights; a clean glass or jar filled with water; a food-grade plastic bag filed with 2% brine (in case it leaks – your scrap-chi will be negatively affected if fresh water leaked in and diluted the salt content); a heavy plate; half an apple; a scrunched & folded cabbage leaf… really just anything that is clean and heavy enough to keep all the solid bits submerged. Then pop the lid on the jar. You can either leave it loosely capped so fermenting gasses escape as needed, or you can screw the lid shut tight and just make sure to ‘burp’ the jar every day to release those gasses.


7. Leave it alone in a cool dark spot for 3-5 days.
A pantry or a cool spot in the laundry is ideal. Somewhere that stays cool in summer is important, as heat speeds up bacterial growth, and you want to ensure the ‘good’ bacteria (Lactobacillus) are given time to thrive before any other, less desirable bacteria can kick off.
Generally you’ll start to see bubbles form after 2-3 days, which is a sign active fermentation is occurring. You’ll also notice the brine going a bit cloudy, and the aroma of the mixture will alter, becoming more funky as time goes on. You can start tasting after you’ve seen bubbles gathering at the top, and once you’re happy with the flavour, screw the lid on tight and pop the jar in the fridge. It might be on day 3, or day 5, or anywhere after that. Once fermented, the food won’t go ‘off’, so it can safely stay on the bench for as long as you like, as long as all solid bits are kept submerged.
In the fridge, fermentation will slow drastically, but not completely stop, so over time the ferment will become less crunchy and might even get a bit fizzy. This is all still perfectly fine and safe to eat – it’s just usually not people’s’ preferred texture and mouthfeel. So aim at using this ferment up within a couple of months, even though technically, it could remain foodsafe in the fridge for several years!

Want not, waste not
And last but not least, check out these notes on how all the ‘waste’ from making Scrap-chi is taken care of. Nothing is wasted!!
Xo
NannaAnna
Permaculture Principle 2: Catch & store energy; 3: Obtain a yield; 6: Produce no waste
Take a look at some of our other food waste hacks…